Exercise 1.1: Policy Creation
Objective
- Create a transparent rapid deployment policy.
- Enable application security logging profile.
- Validate that both the policy and logging profile are working.
- Configure Geolocation and review logs
- Configure IP Intelligence and review logs
- Estimated time for completion: 30 minutes.
Note
If the Operating system prompts you to update system software, please decline
- RDP to the the jumpbox, launch Chrome (please be patient and don’t click the icon multiple times. Chrome can take a few seconds to launch), click the BIG-IP bookmark and login to TMUI. admin/f5DEMOs4u!
Note
The XRDP service automatically opens a persistent shell in the top left corner of your desktop. Type exit to make it go away.
Please ensure that four virtual servers are configured before you begin:
webgoat.f5demo.com_https_vswebgoat.f5demo.com_https_overlay_vswebgoat.f5demo.com_http_vsautomation_vs
Create Your 1st WAF Policy
- On the Main tab, click Security > Application Security > Security Policies. The Active Policies screen opens.
- Click on the Polices List
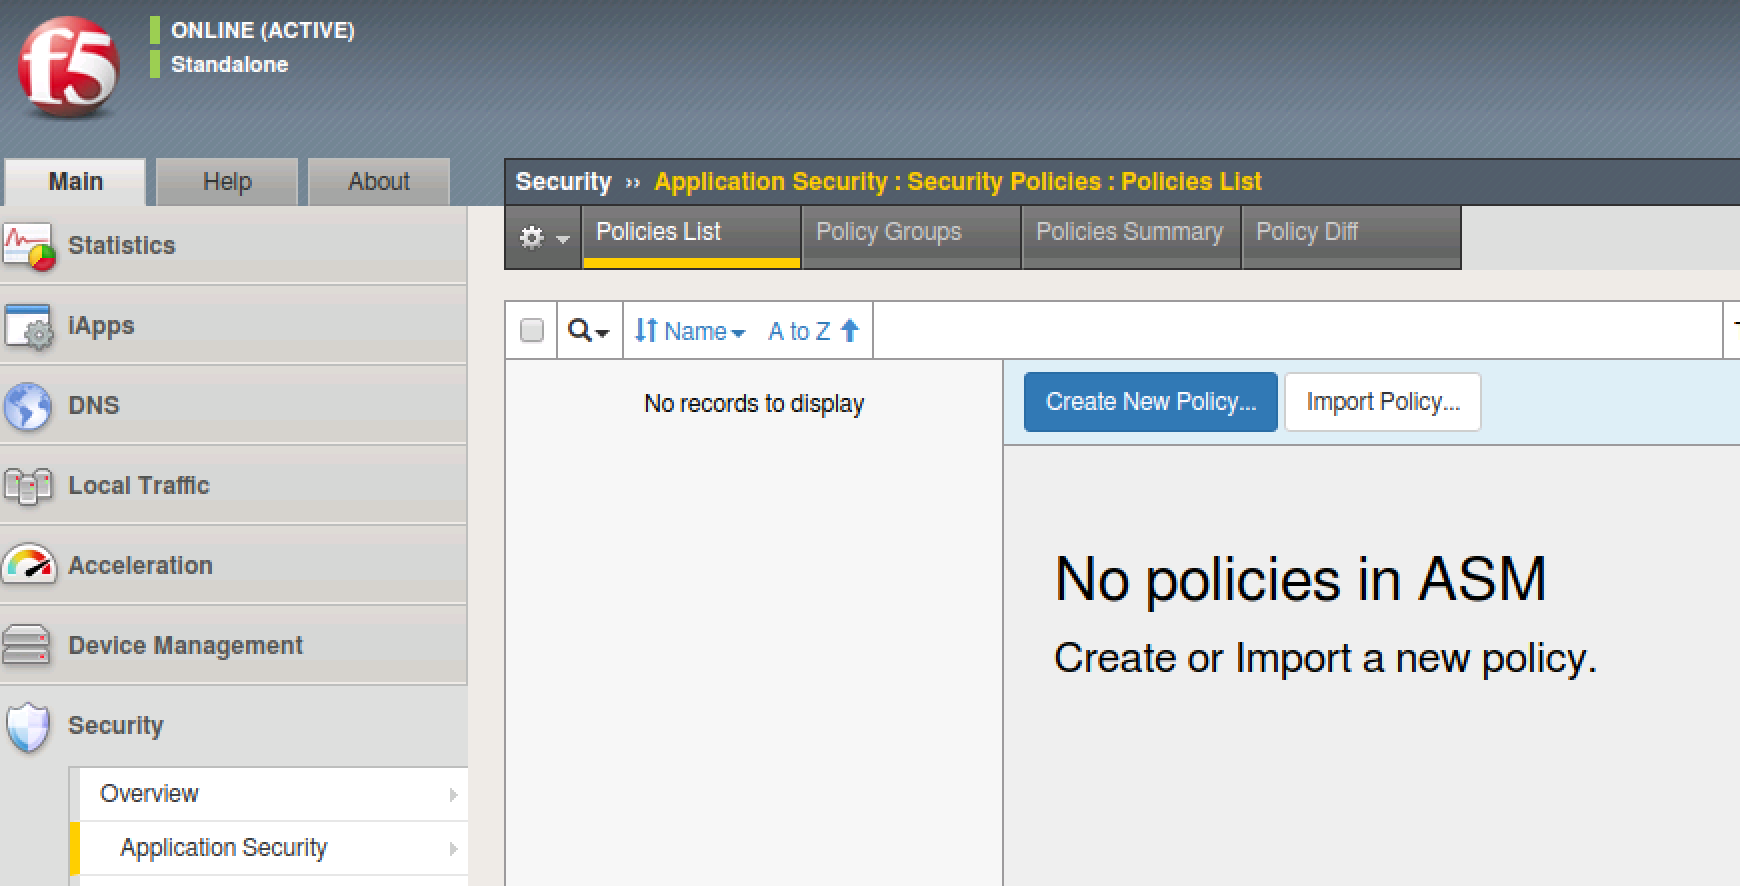
- Click on the Create New Policy button. The policy creation wizard opens.
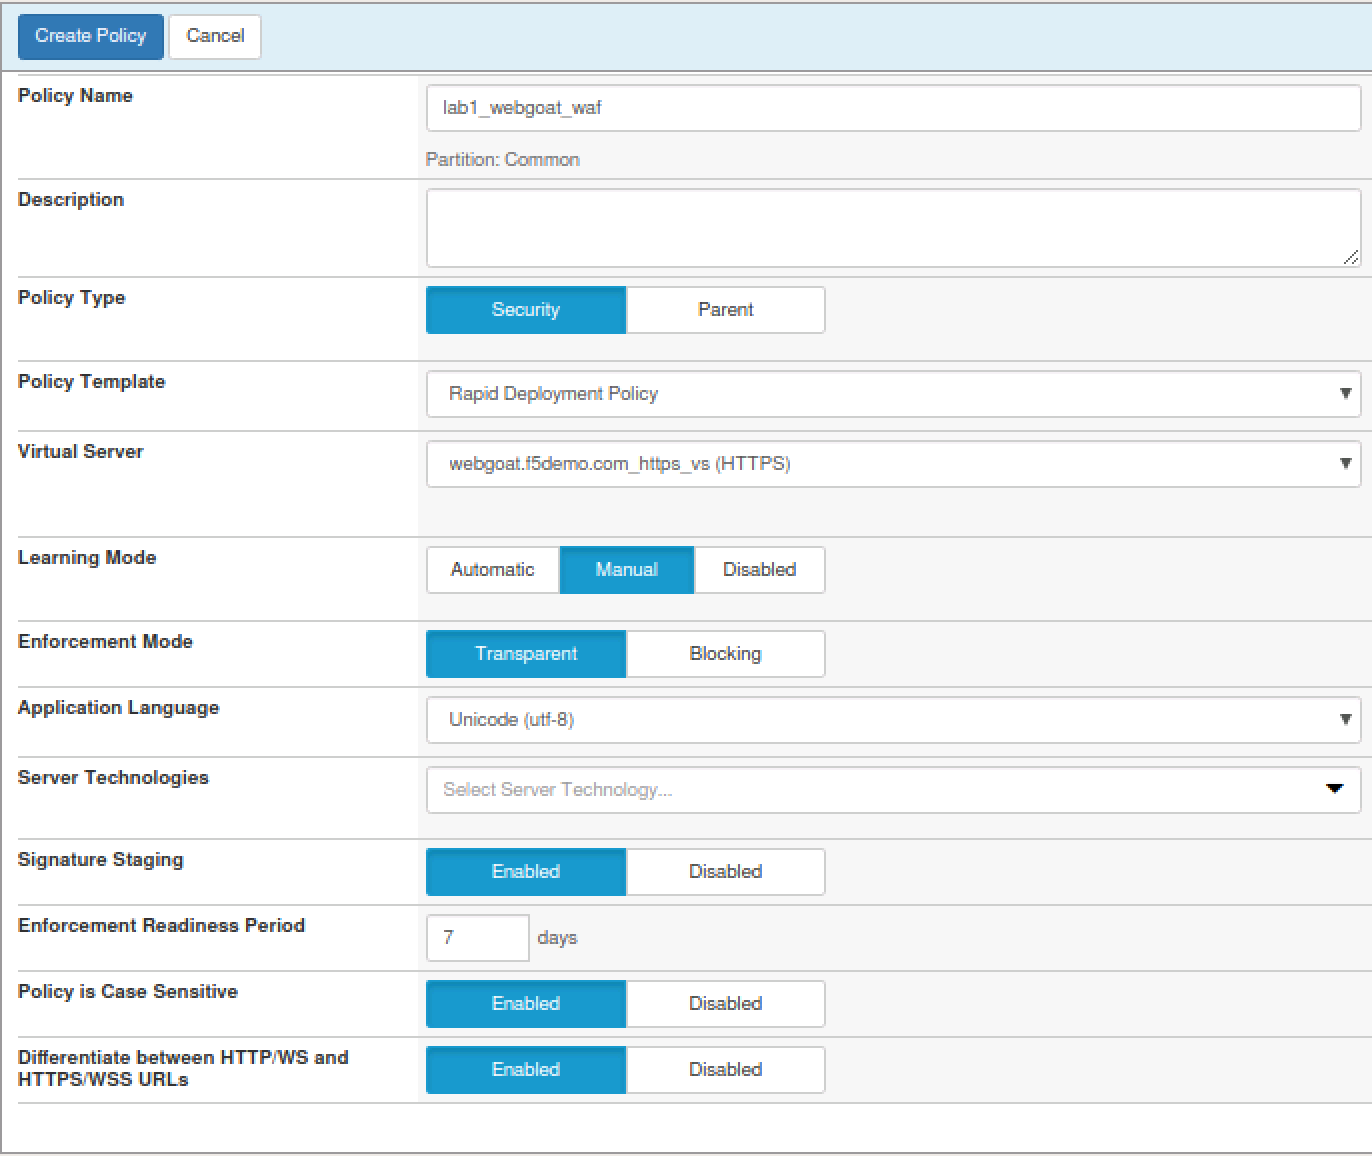
- Click on the Advanced button (Top-Right) to ensure that all the available policy creation options are displayed.
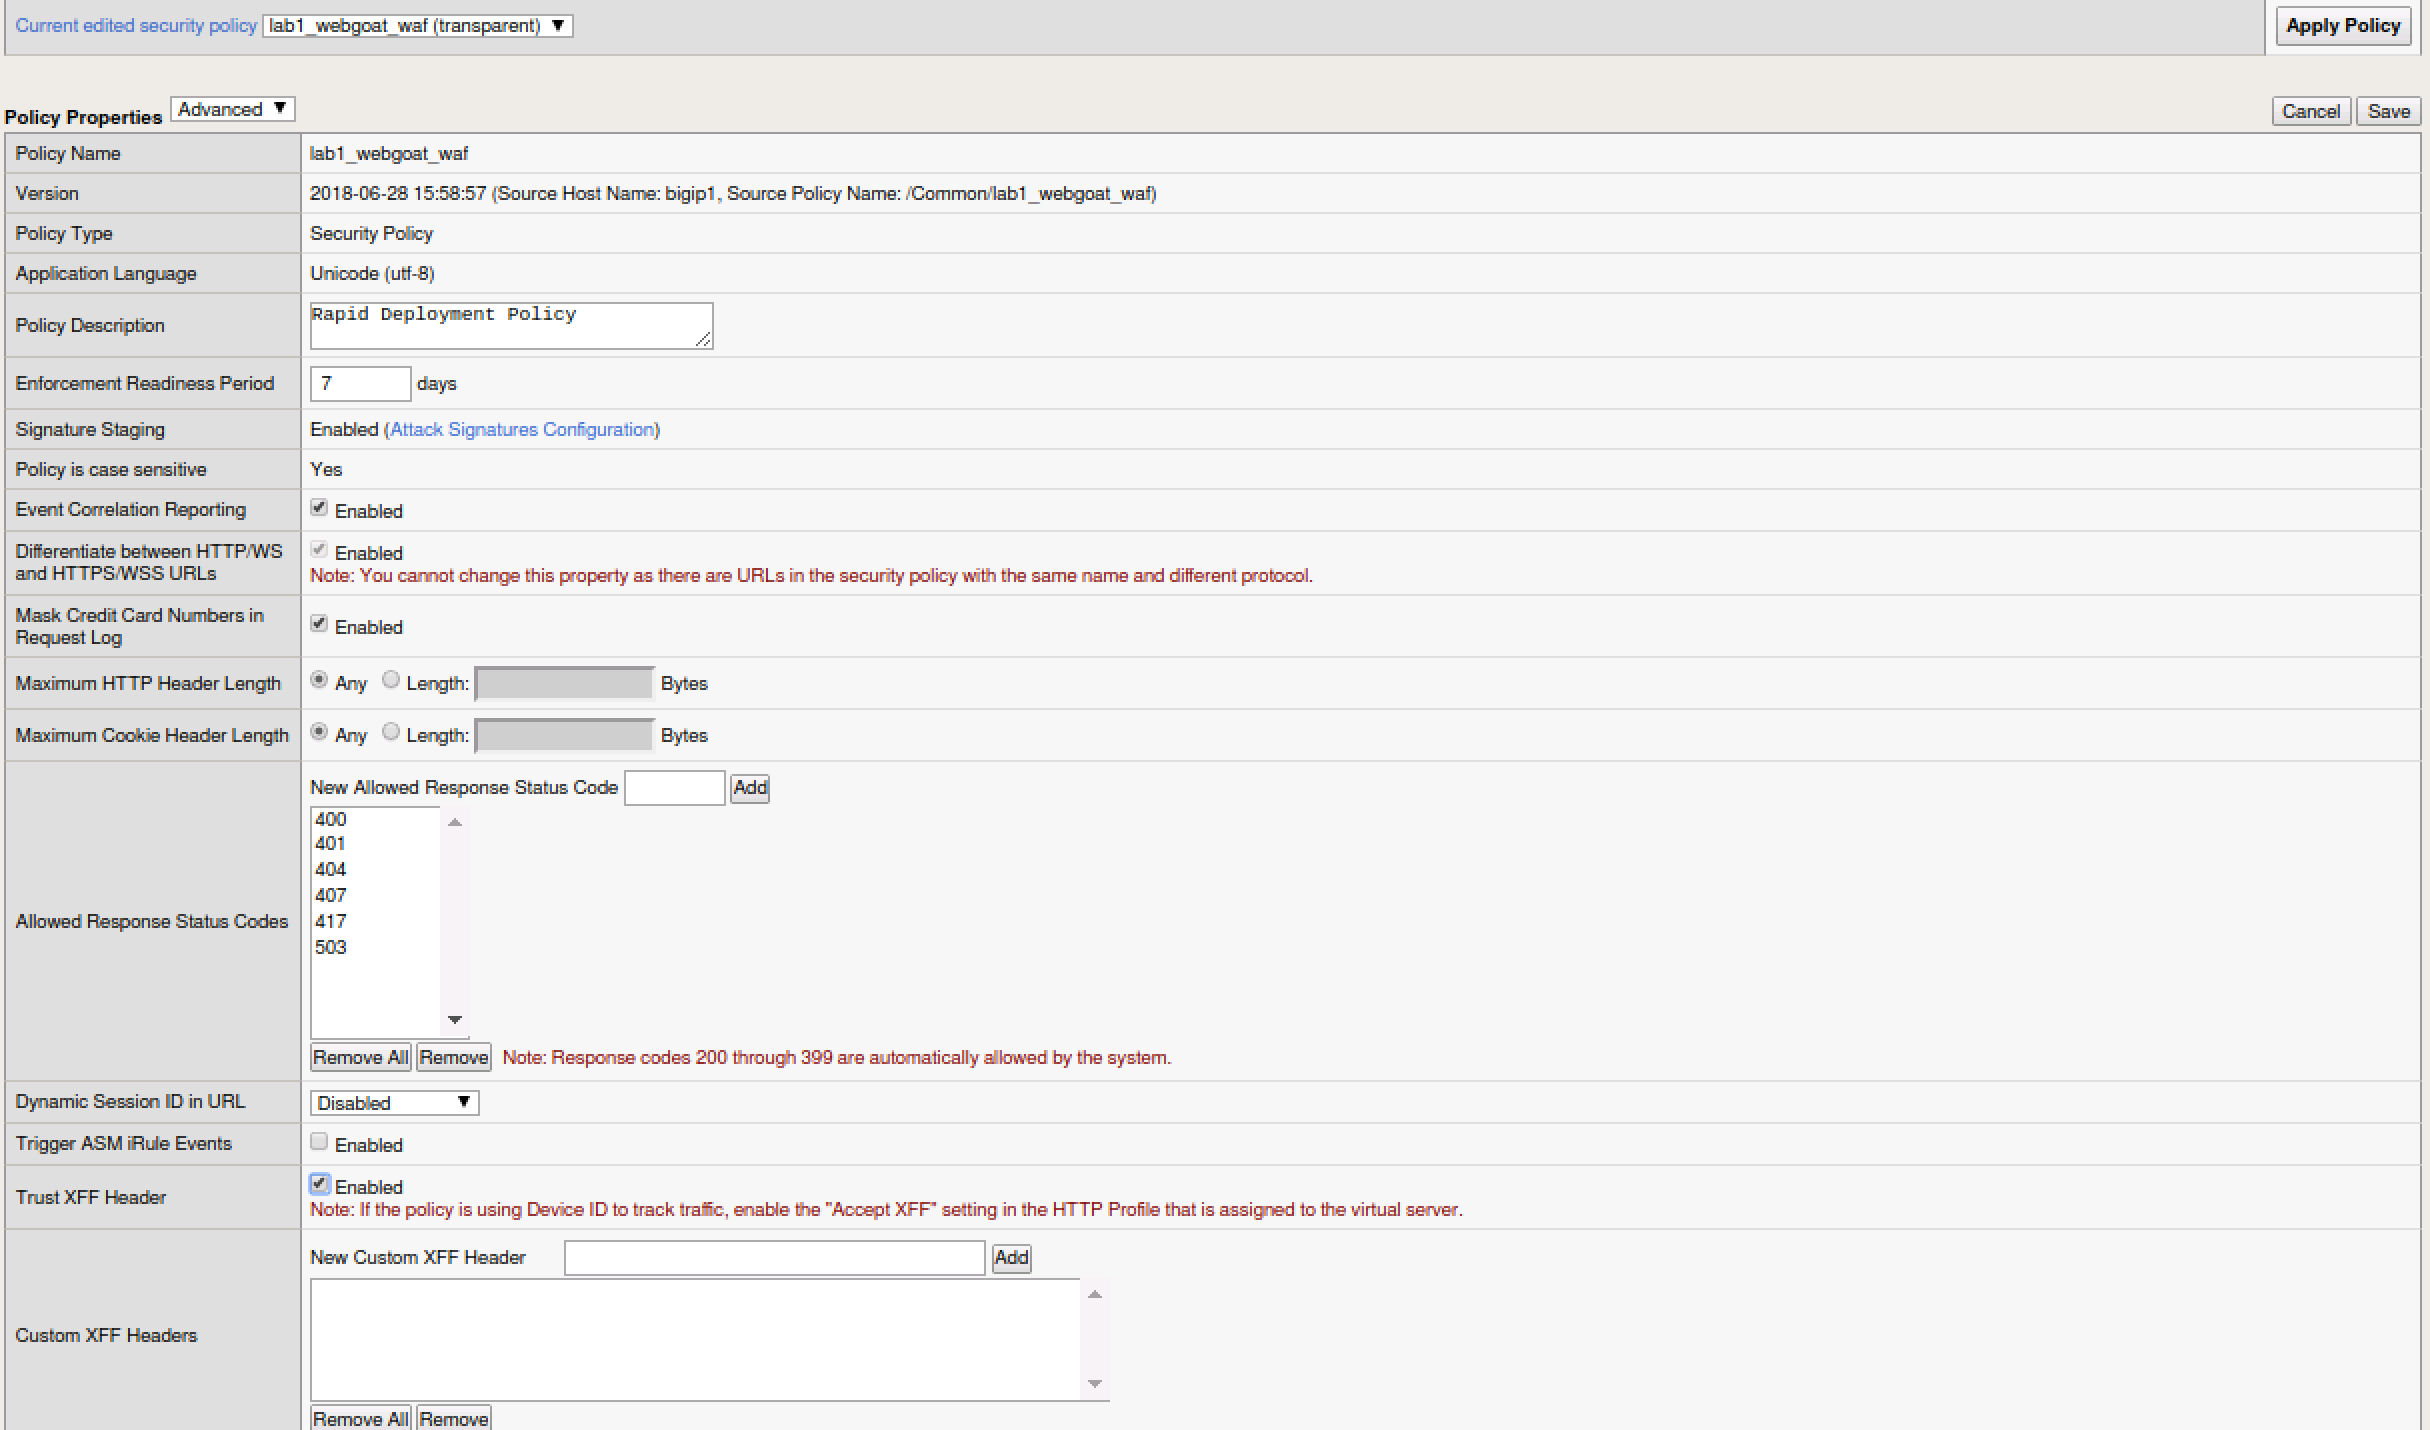
- Name the security policy
lab1_webgoat_wafand notice that the Policy Type is security. - Verify the Policy Template is set to
Rapid Deployment Policyand notice it is a transparent security policy by default - Assign this policy to the
webgoat.f5demo.com_https_vsfrom the Virtual Server drop down. - Confirm that the Application Language is set to UTF-8.
- Accept the remaining default policy settings and click Create Policy to complete the policy creation process.
Note
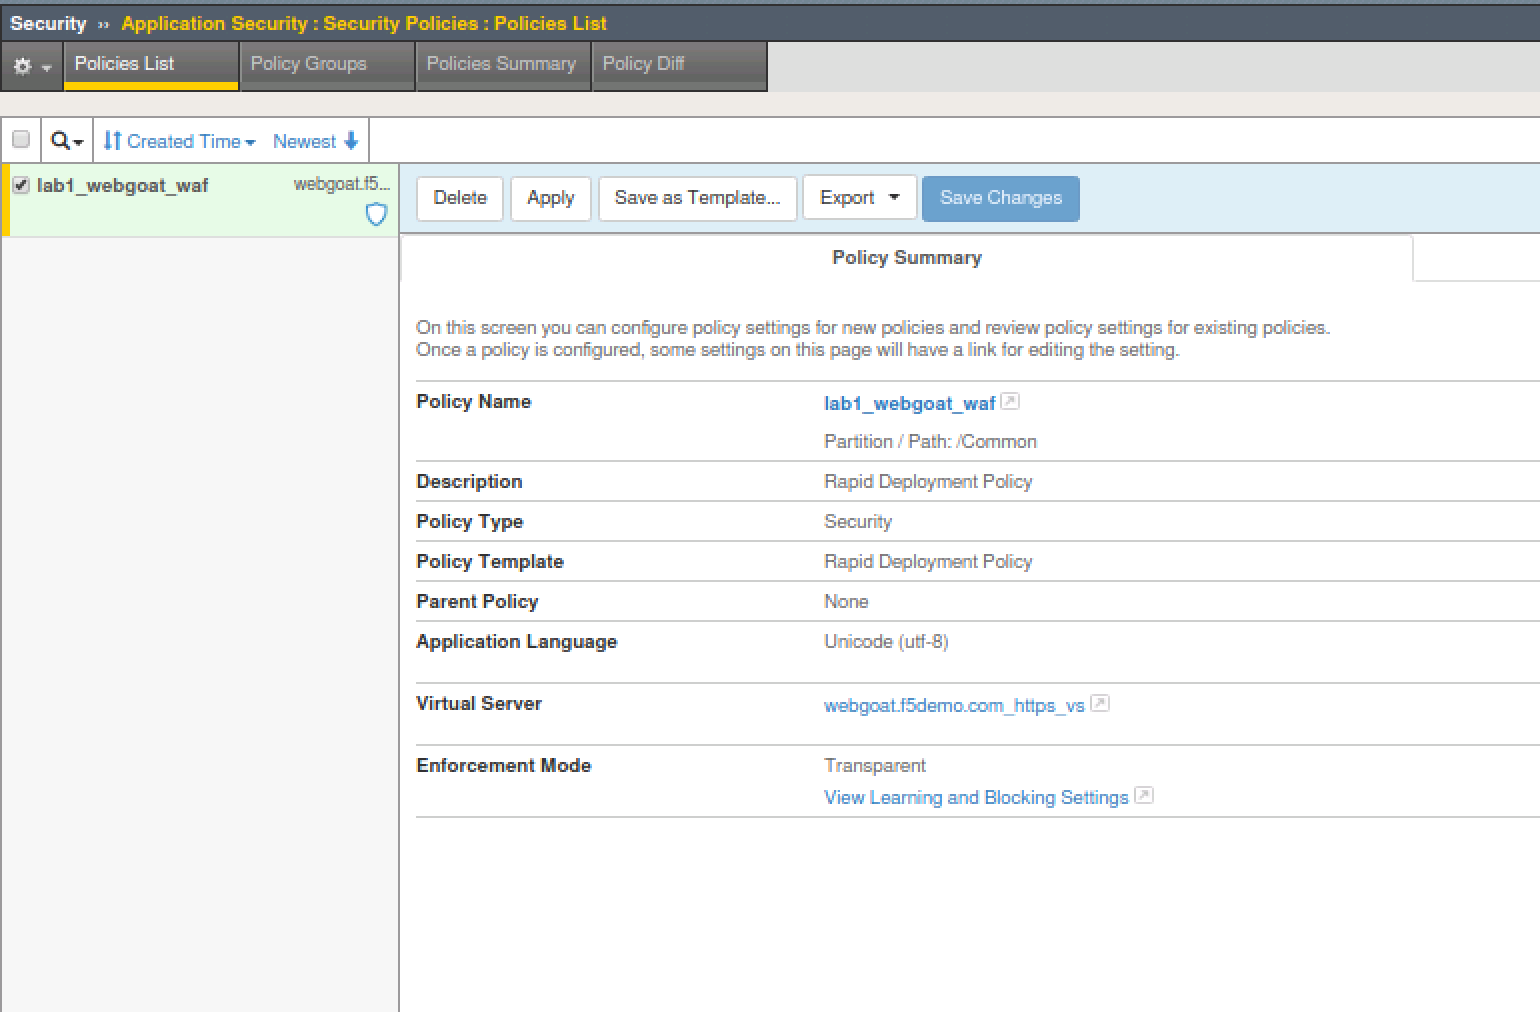
After policy creation is complete, the properties will be displayed for review within the Policies List menu.
Your settings should reflect the figures below:
Verify WAF Profile is Applied to Virtual Server
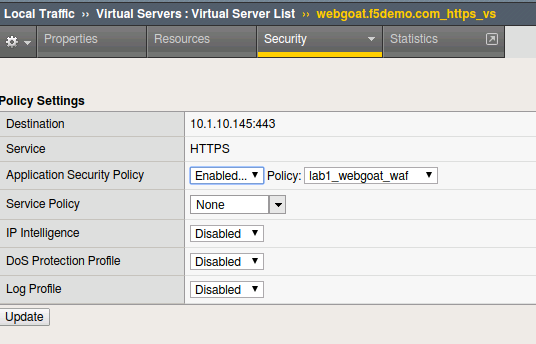
- In the configuration utility navigate to Local Traffic > Virtual Servers, click on
webgoat.f5demo.com_https_vs. - Click on Policies under the Security tab at the top of the
webgoat.f5demo.com_https_vsdetails menu. - In the Application Security Policy drop down menu, ensure Application Security Policy is
Enabled...and the Policy: drop-down selection shows thelab1_webgoat_wafpolicy. - Notice Log Profile is set to
Disabled.
Create Application Security Logging Profile
- In the configuration utility navigate to Security > Event Logs > Logging Profiles then click on the plus icon.
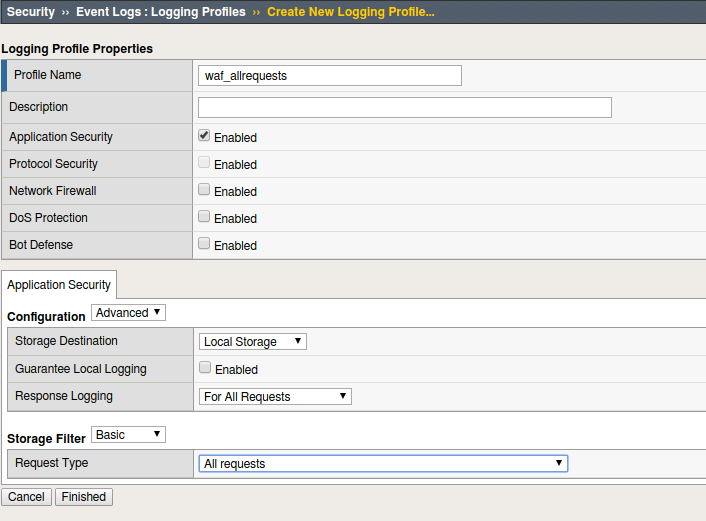
- Under the Logging Profile Properties section enter a Profile Name
waf_allrequests, select the checkbox forApplication Security. - Change the Configuration dropdown to
Advancedunder the Application Security section. - Select the
Local Storagevalue for the Storage Destination configuration option. - Select the
For all Requestsvalue for the Response Logging configuration option. - Select the
All requestsvalue for the Request Type configuration option. - Click Finished.
Question: Would logging all requests and responses in a production environment be a best practice?
Answer: This adds 50% or more to the overhead on the log engine and would not typically be used outside of troubleshooting or high security environments that are appropriately sized.
Apply WAF Logging Profile
- Under Local Traffic > Virtual Servers, click on
webgoat.f5demo.com_https_vs. - Click on Policies under the Security tab at the top of the
webgoat.f5demo.com_https_vsdetails menu. - In the Log Profile drop down menu, select
Enabled... - Within the Available logging profiles menu, select
waf_allrequestsand then click the << arrows to move the logging policy to the Selected profile. - Click on the Update button to apply the policy.

Test WAF Policy
- Open the Google Chrome browser and navigate to
https://webgoat.f5demo.com/WebGoat/loginYou’ll find a toolbar shortcut for the webgoat link.
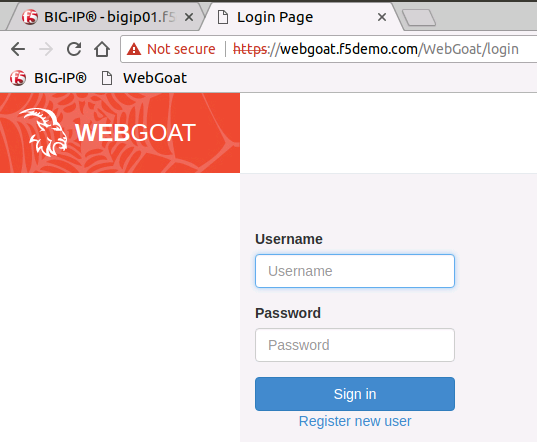
Login using f5student/f5DEMOs4u! credentials and interact with the webgoat application by browsing. Please refrain from experimenting with the site using any familiar “exploit” techniques.
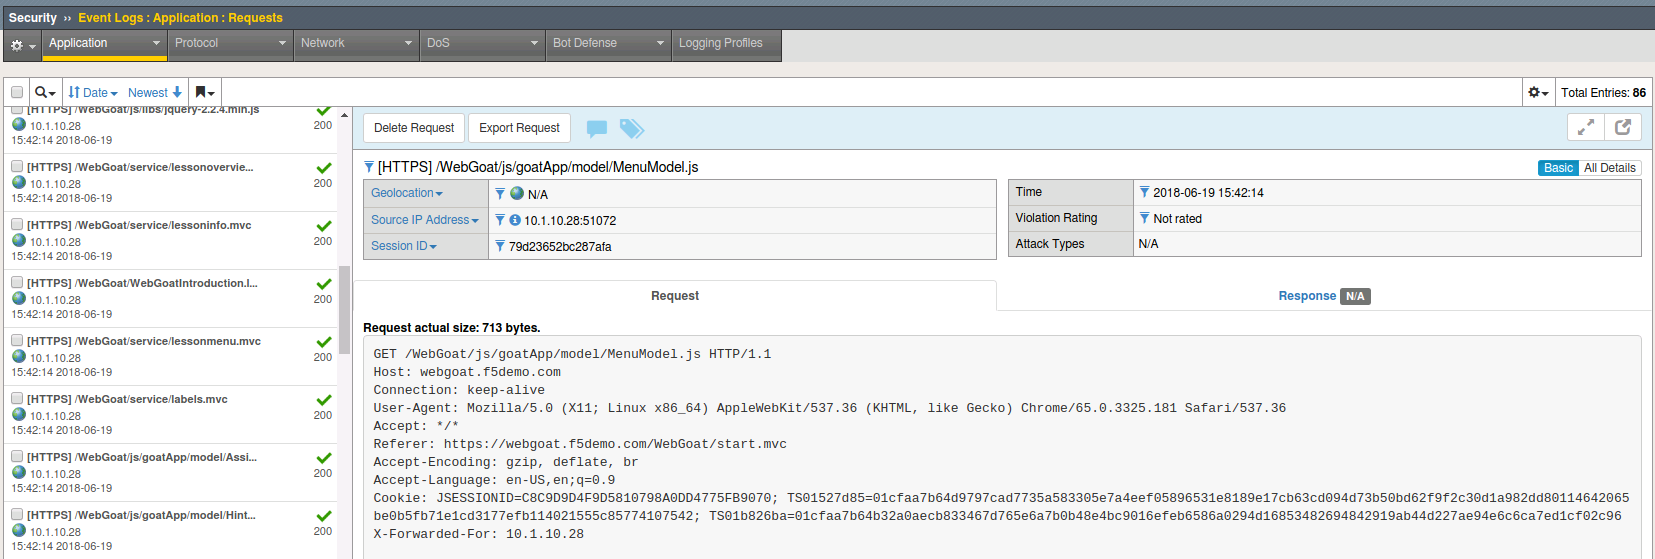
On the BIG-IP, navigate to Security > Event Logs > Application > Requests.
Clear the default “Illegal Requests” filter by clicking the x.
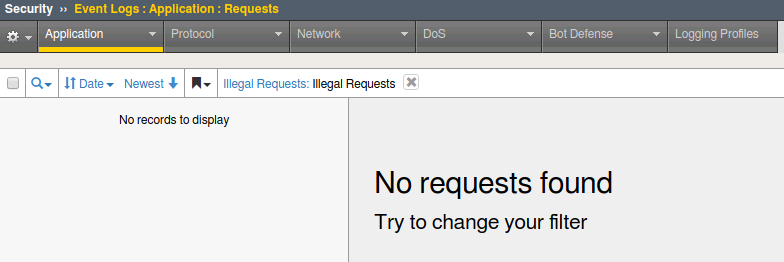
Verify that requests are being logged by the WAF. You should be able to see both the raw client requests and server responses.
Exercise 1.2: Geolocation and IP Intelligence
Geolocation
Open Security > Application Security > Geolocation Enforcement
Select all geolocations except the United States and N/A and move them to Disallowed Geolocations. Save and then Apply Policy.
Note
N/A covers all RFC1918 addresses. If you aren’t dropping them at your border router (layer 3), you may decide to geo-enforce at ASM (Layer 7) if no private IP’s will be accessing the site.

Important
Remember to click on the Apply Policy button (top right) to commit security policy changes.
Open Local Traffic > iRules and open the iRule titled
webgoat_iruleand review the code.1 2 3
when HTTP_REQUEST {
   HTTP::header replace X-Forwarded-For "[expr (int(rand()*221)+1)].[expr int(rand()*254)].[expr int(rand()*254)].[expr int(rand()*254)]"
}
Note
The above iRule is essentially scanning the HTTP headers and when it finds the
X-Forwarded-Forheader it will replace the original source IP address with a randomized IP address. Since we are only manipulating the header this has no discernable affect on traffic flow. This iRule event,when HTTP_REQUEST, also fires before the ASM policy allowing this “trick” to work to demonstrate a global range of source IP addresses.Open Local Traffic > Virtual Servers and click on
webgoat.f5demo.com_https_vs. Go to the Resources horizontal tab and click on Manage in the iRules section.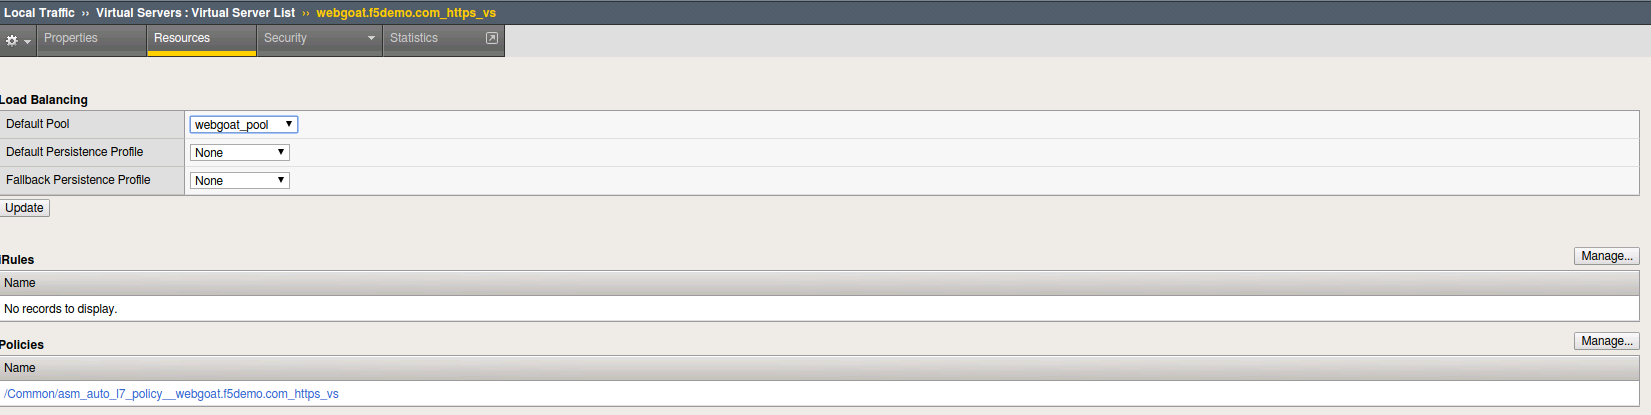
Select the
webgoat_irule, move it to the Enabled assignment and click Finished.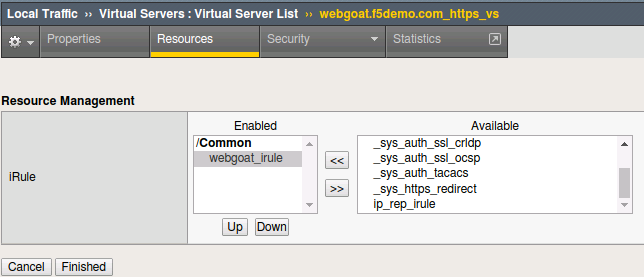
6. We now need to tell ASM to trust the XFF header by turning on the Trust XFF Header feature in the policy. Navigate to Application Security > Policy > Policy Properties and hit the dropdown for Advanced View. You can now check the box to Trust XFF Header and click Save then Apply Policy
Note
Regarding Trust XFF - you would do this if ASM is deployed behind an internal or other trusted proxy. Then, the system uses the IP address that initiated the connection to the proxy instead of the internal proxy’s IP address. This option is useful for logging, web scraping, anomaly detection, and the geolocation feature.
You should not configure trusted XFF headers if you think the HTTP header may be spoofed, or crafted, by a malicious client.
- Open a new Google Chrome Private Browsing window and connect to
https://webgoat.f5demo.com/WebGoat/login. Login and select a few links on the WebGoat page. - Navigate to Security > Event Logs > Application > Requests.
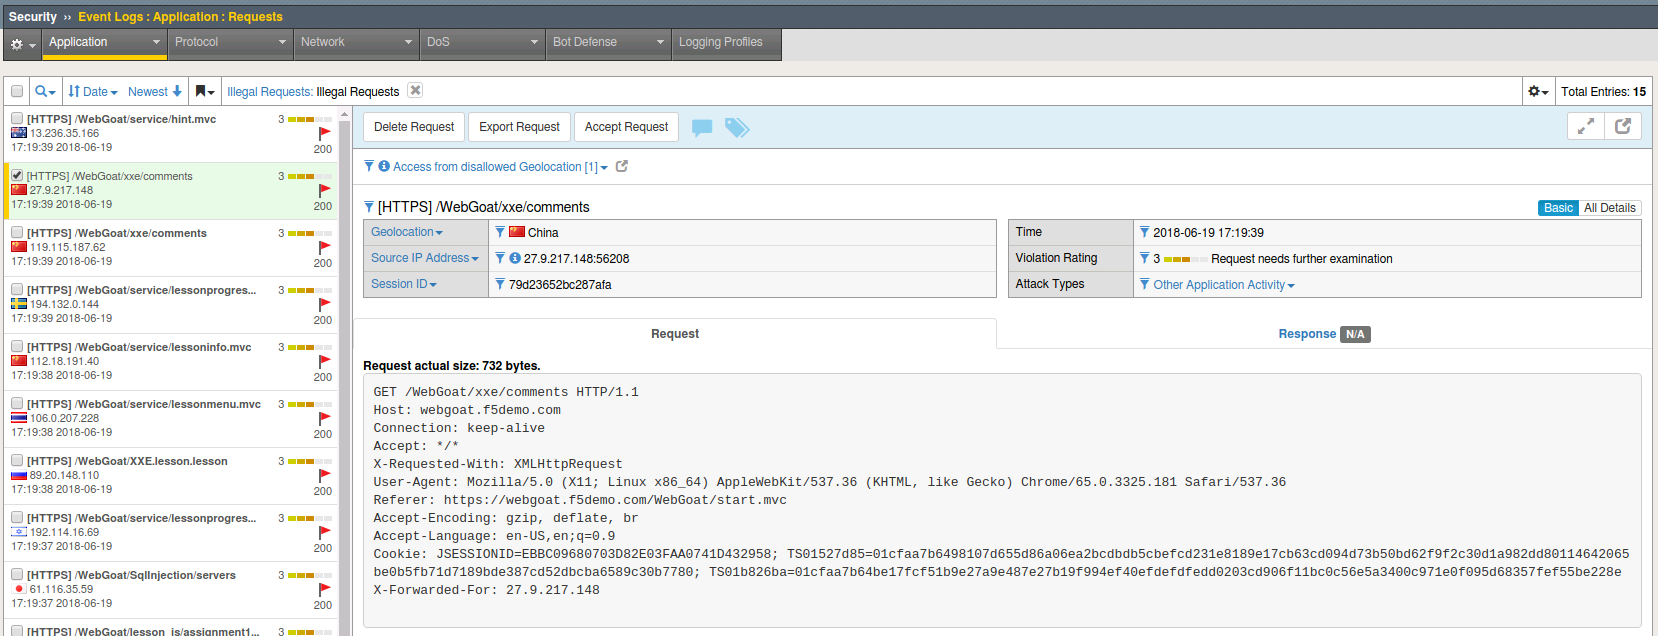
Notice the geolocation detected and the presence of the X-Forwarded-For (XFF) in the Request details. Your actual client IP is still 10.1.10.28 however, because we trusted the XFF header and the iRule is randomizing the IP address placed in that header so ASM believes the request is from an external location. Depending on your network you may be leveraging a technology that creates a source NAT ahead of ASM. So by leveraging the XFF header, you can work around this and get contextual information about the client.
Important
Please remove the iRule webgoat_irule from the
Virtual Server before proceeding.
IP Reputation
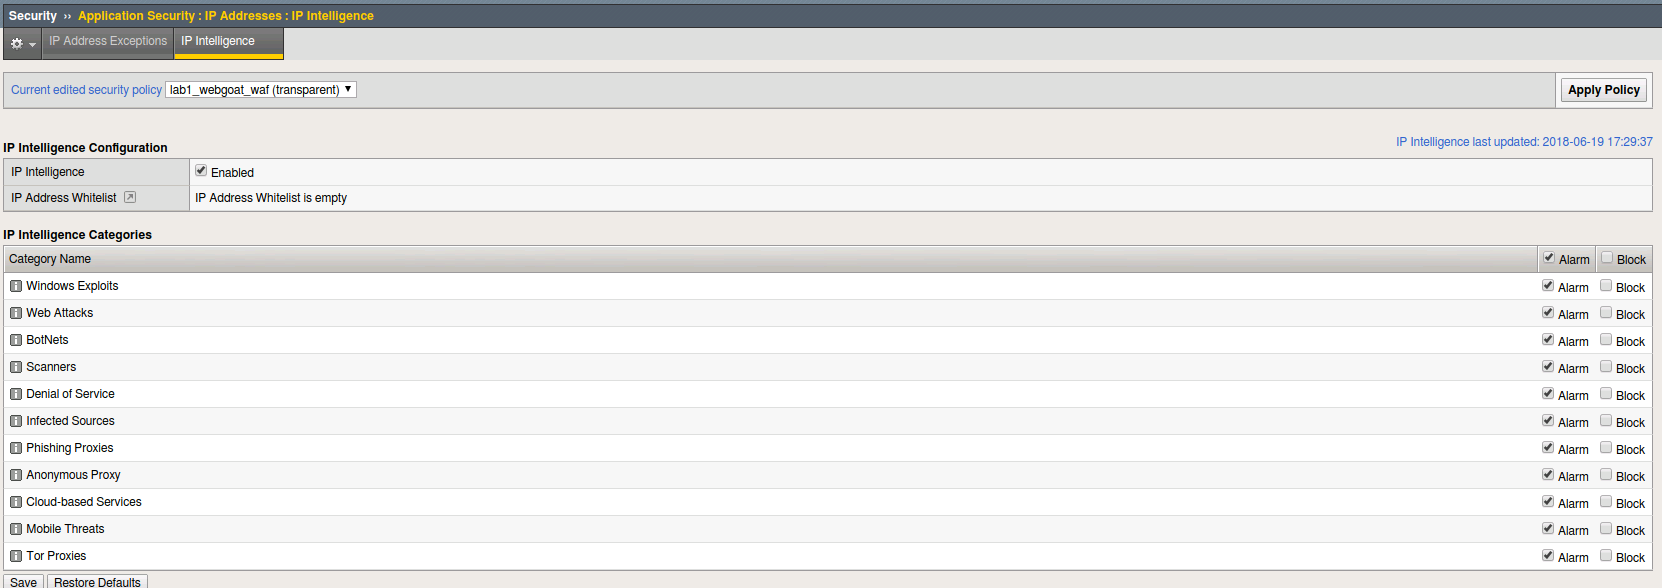
Navigate to Security > Application Security > IP Addresses > IP Intelligence and click Enabled. For all categories select Alarm. Click on Save and then on Apply Policy.
Note
On the top right you should see that your IP Intelligence database has been updated at some point.
Note
In order to create traffic with malicious sources for the purposes of this lab we have created another special configuration item for you.
There is an iRule that you will apply to the webgoat.f5demo.com_https_vs virtual server.
This iRule will insert an X-Forward-For header with the value of a malicious United States source IP address. (Remember US is an allowed Geolocation)
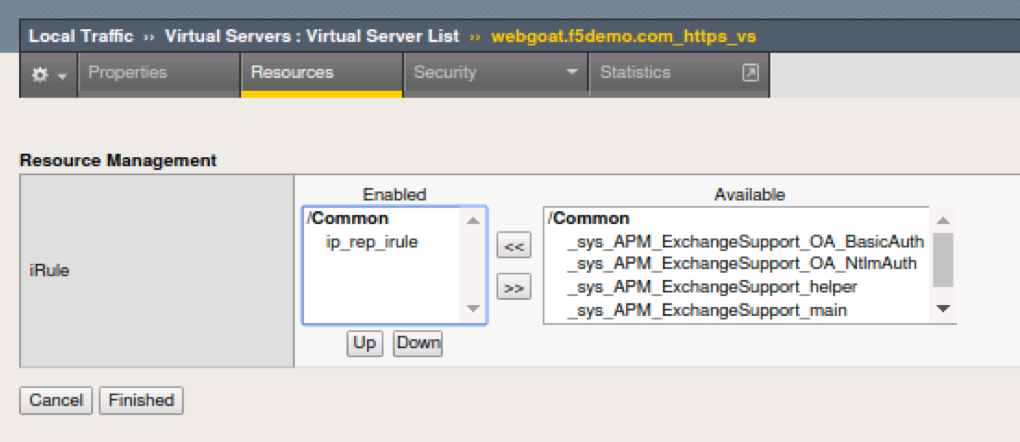
- Navigate to Local Traffic > Virtual Server > Virtual Servers List and select the
webgoat.f5demo.com_https_vsvirtual server.
Navigate to the Resources tab and click Manage for the iRules section.
Move the ip_rep_irule irule to the Enabled pane of the Resource Management configuration and Click Finished.
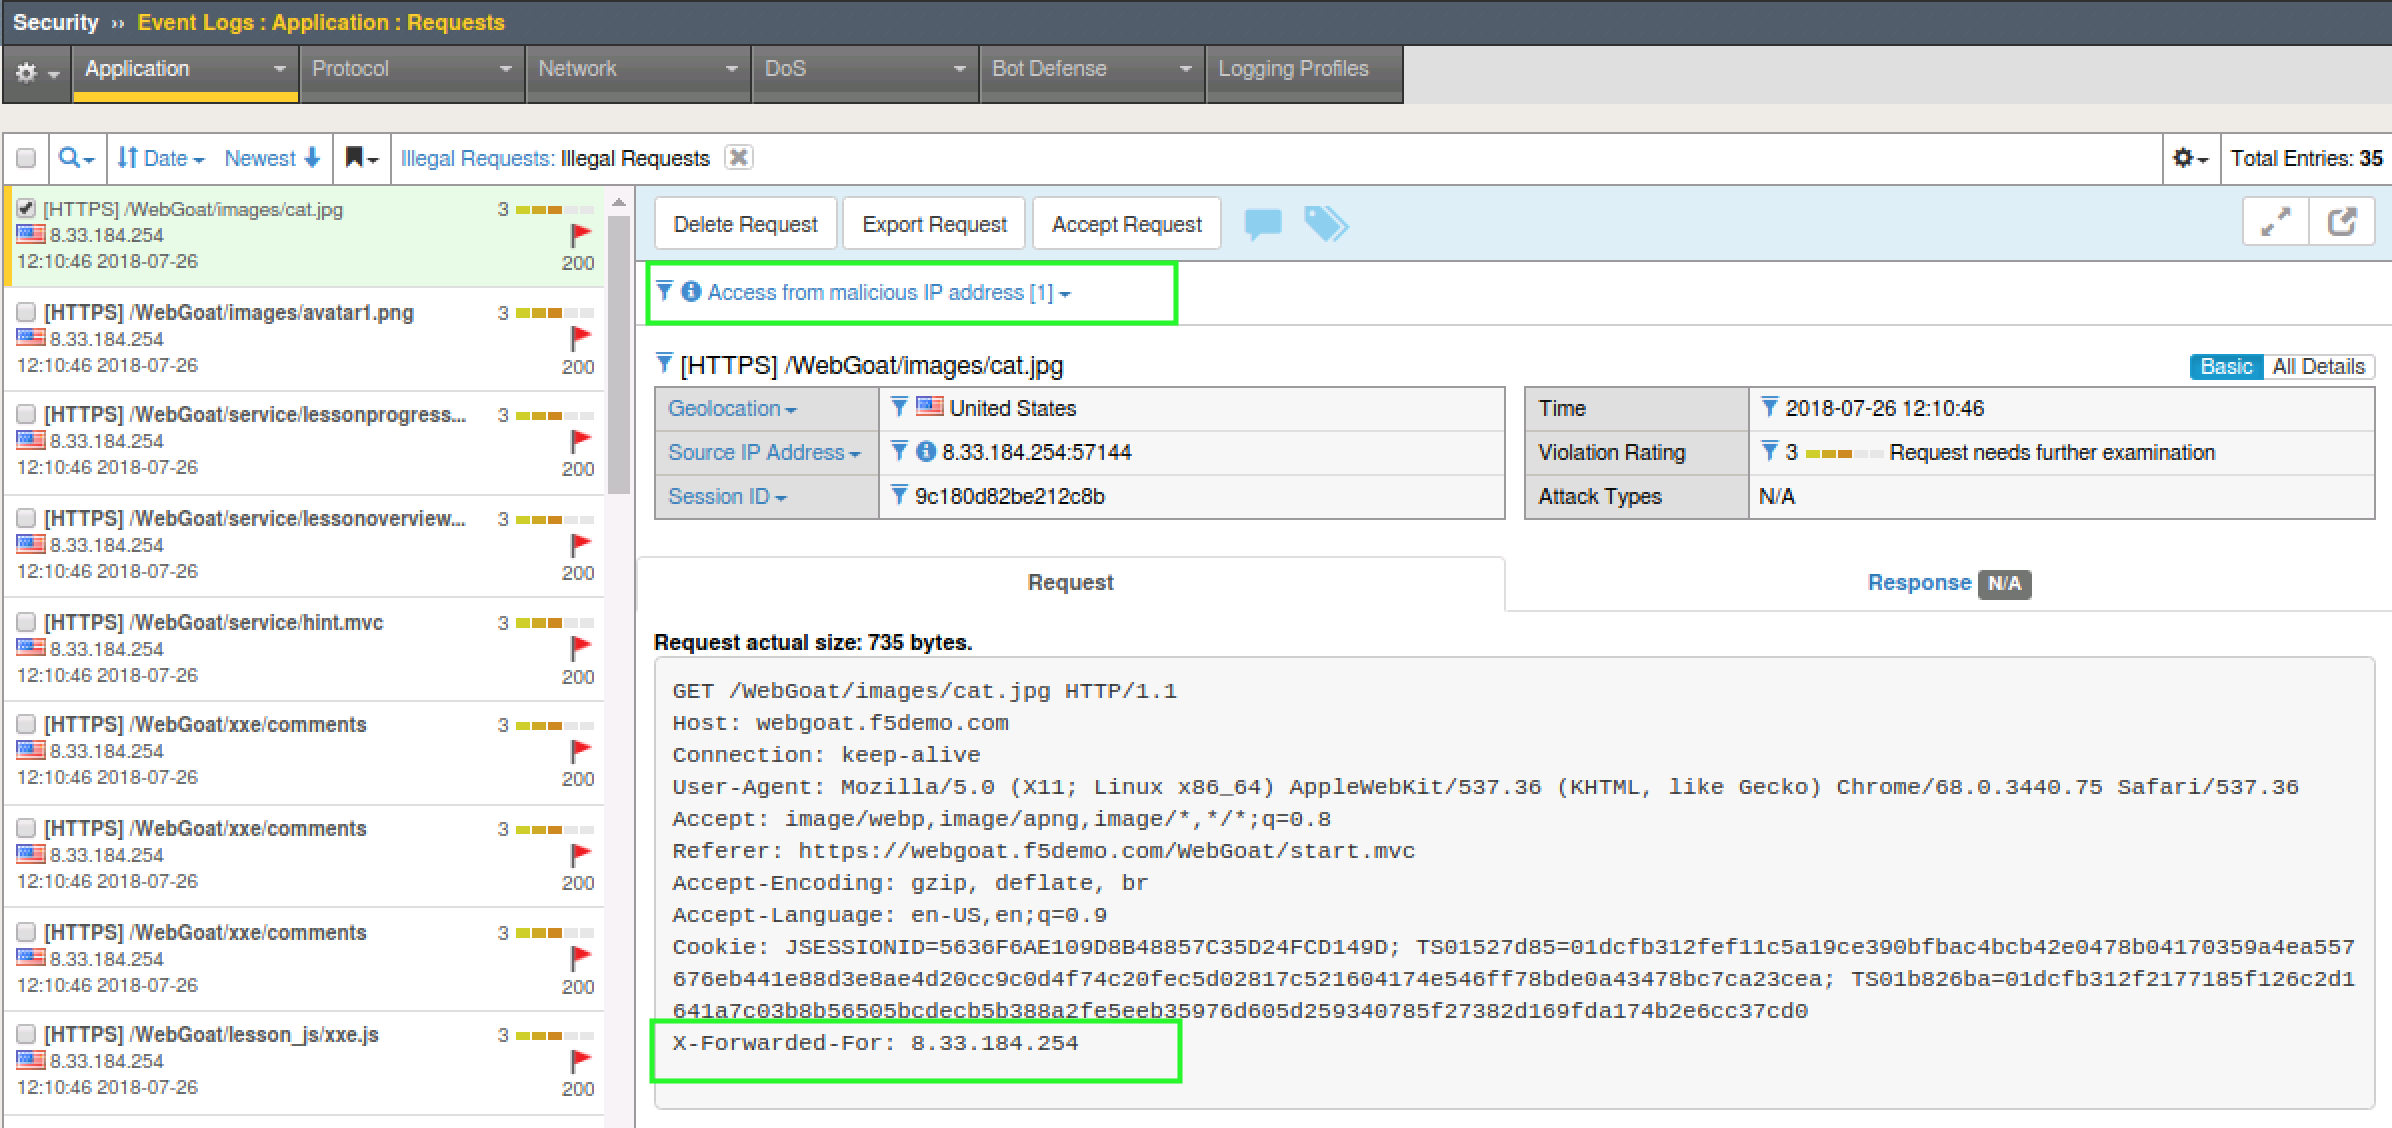
Open a new private browsing window in Google Chrome and use the bookmark for WebGoat to browse the site. Login and Click on one or two items.
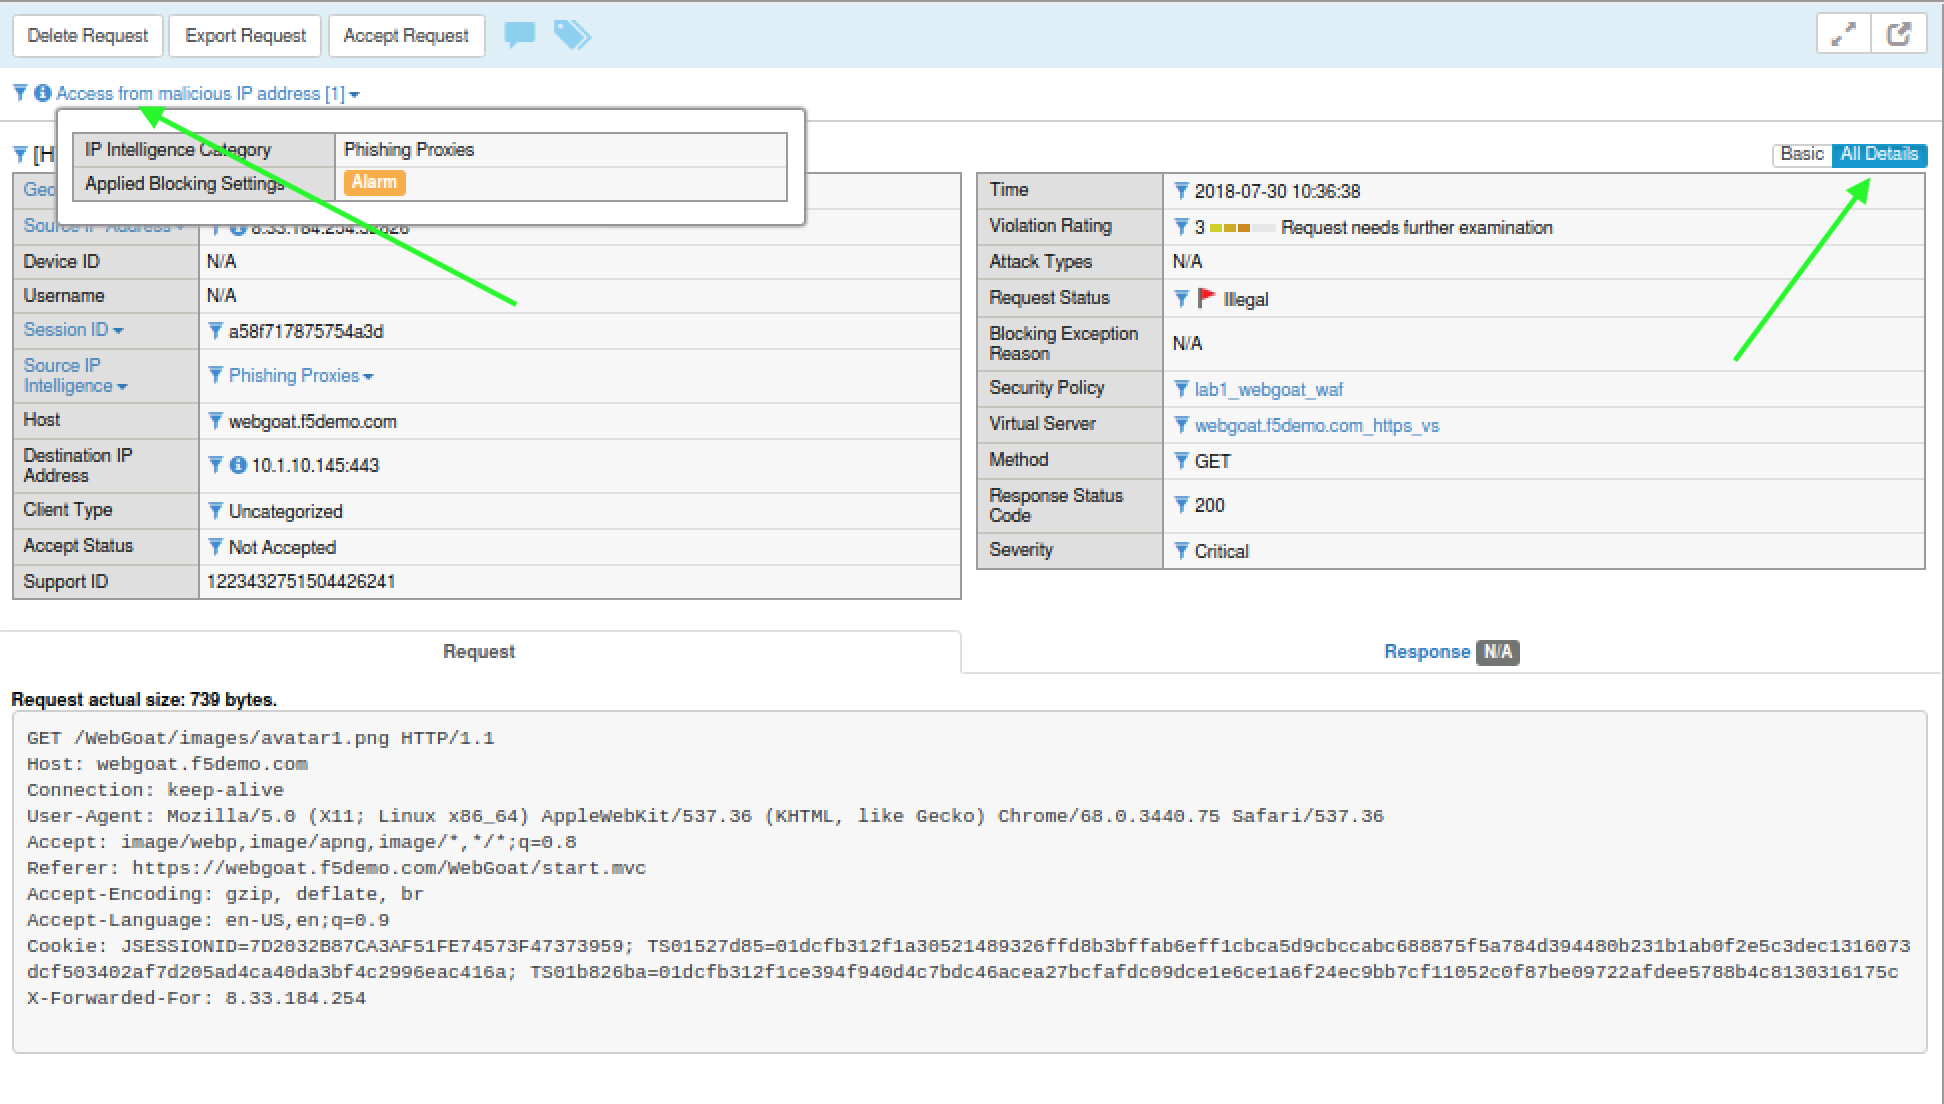
Navigate to Security > Event Logs > Application > Requests and review the log entries. Since you configured IP Intelligence violations to alarm you will not need to change the filter. Select the most recent entry and examine why the request is illegal. What IP address did the request come from?
Note
For more information click on the violation hyperlink to see the IPI category that this IP belongs to. You can also click “All Details” at the top right.
Bonus: You can browse to http://www.brightcloud.com/tools/url-ip-lookup.php
and look up the IP address in question for further information. There is also
a tool to report IP addresses that have been incorrectly flagged.
Further, you can ssh to the BIG-IP and login with root / f5DEMOs4u! to run
the iprep_lookup command, similar to:
[root@bigip1.Active.Standalone] config # iprep_lookup 8.33.184.254
iprep_lookup 8.33.184.254 opening database in /var/IpRep/F5IpRep.dat size of IP reputation database = 37026703 iprep threats list for ip = 8.33.184.254 is: bit 7 - Phishing