Lab 2.4: Data Guard
Note
Items in this section depend on steps in prior sections, please ensure you’ve completed all sections in lab 2 up to this point before beginning this lab.
DataGuard is a DLP-like feature of ASM that can prevent harmful data leakage from your application in the event of a successful attack. It can also be used to help prevent users from entering certain types of data that should not be stored in a particular system. This feature should be deployed with care as it has the potential to break applications if applied too broadly.
Task 1 - Configure DataGuard
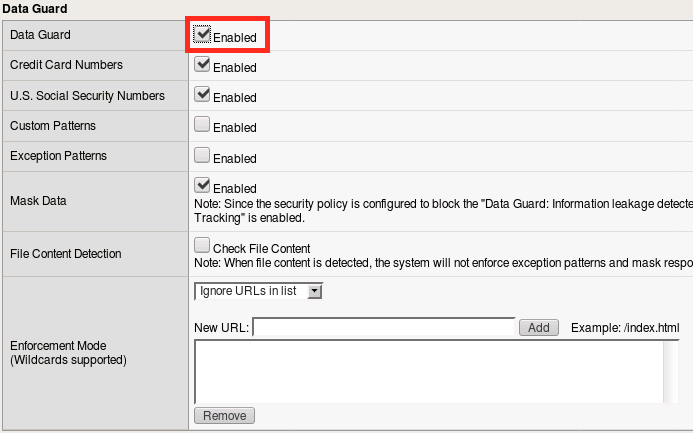
From within your existing ASM policy (Lab2), navigate to Security -> Application Security -> Data Guard.
Click the checkbox to enable DataGuard, then click Save.
Navigate to Security -> Application Security -> Policy Building -> Learning and Blocking Settings.
Use the search box to find the
Data Guardsection and disable blocking: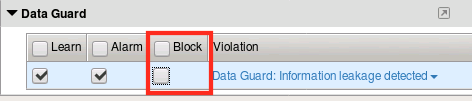
Click Save.
Click Apply Policy then click OK.
Note
Deploying DataGard too pervasively can have a negative performance impact on your system. In a production environment we typically recommend deploying DataGard against specific URLs where possible.
Task 2 - Test DataGuard
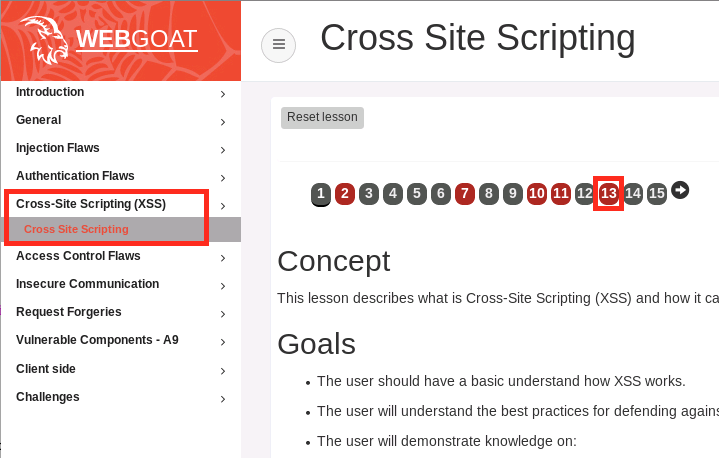
Open a new private browsing window in Firefox and login to WebGoat at
http://10.1.10.145/WebGoat/login.Click Cross Site Scripting in the WebGoat menu then click 13.
Scroll down until you see the Add Comment field. Then type in something that looks like a social security number, like
123-45-6789for example.Note that the value you just entered has been obfuscated:

Try entering something like
Hello World!to see the difference.
Now try a fake credit card number like
4111111111111111. That should also be obfuscated:
Note
You can also use PCRE to define custom patterns for obfuscation. Feel free to experiment with this as it can have interesting consequences for the application (intentional or otherwise).
When you’re finished, return to Local Traffic -> Virtual Servers -> asm_vs -> Security Tab -> Policies and disable your ASM policy in preparation for the next module.
This concludes section 4.